
Robotic Glazing
At the intersection of machine and art
Glazing of ceramics is an age old tradition. Programming a robot to apply glaze on a ceramic panel becomes not only an interesting automation challenge, but also an expression of art.

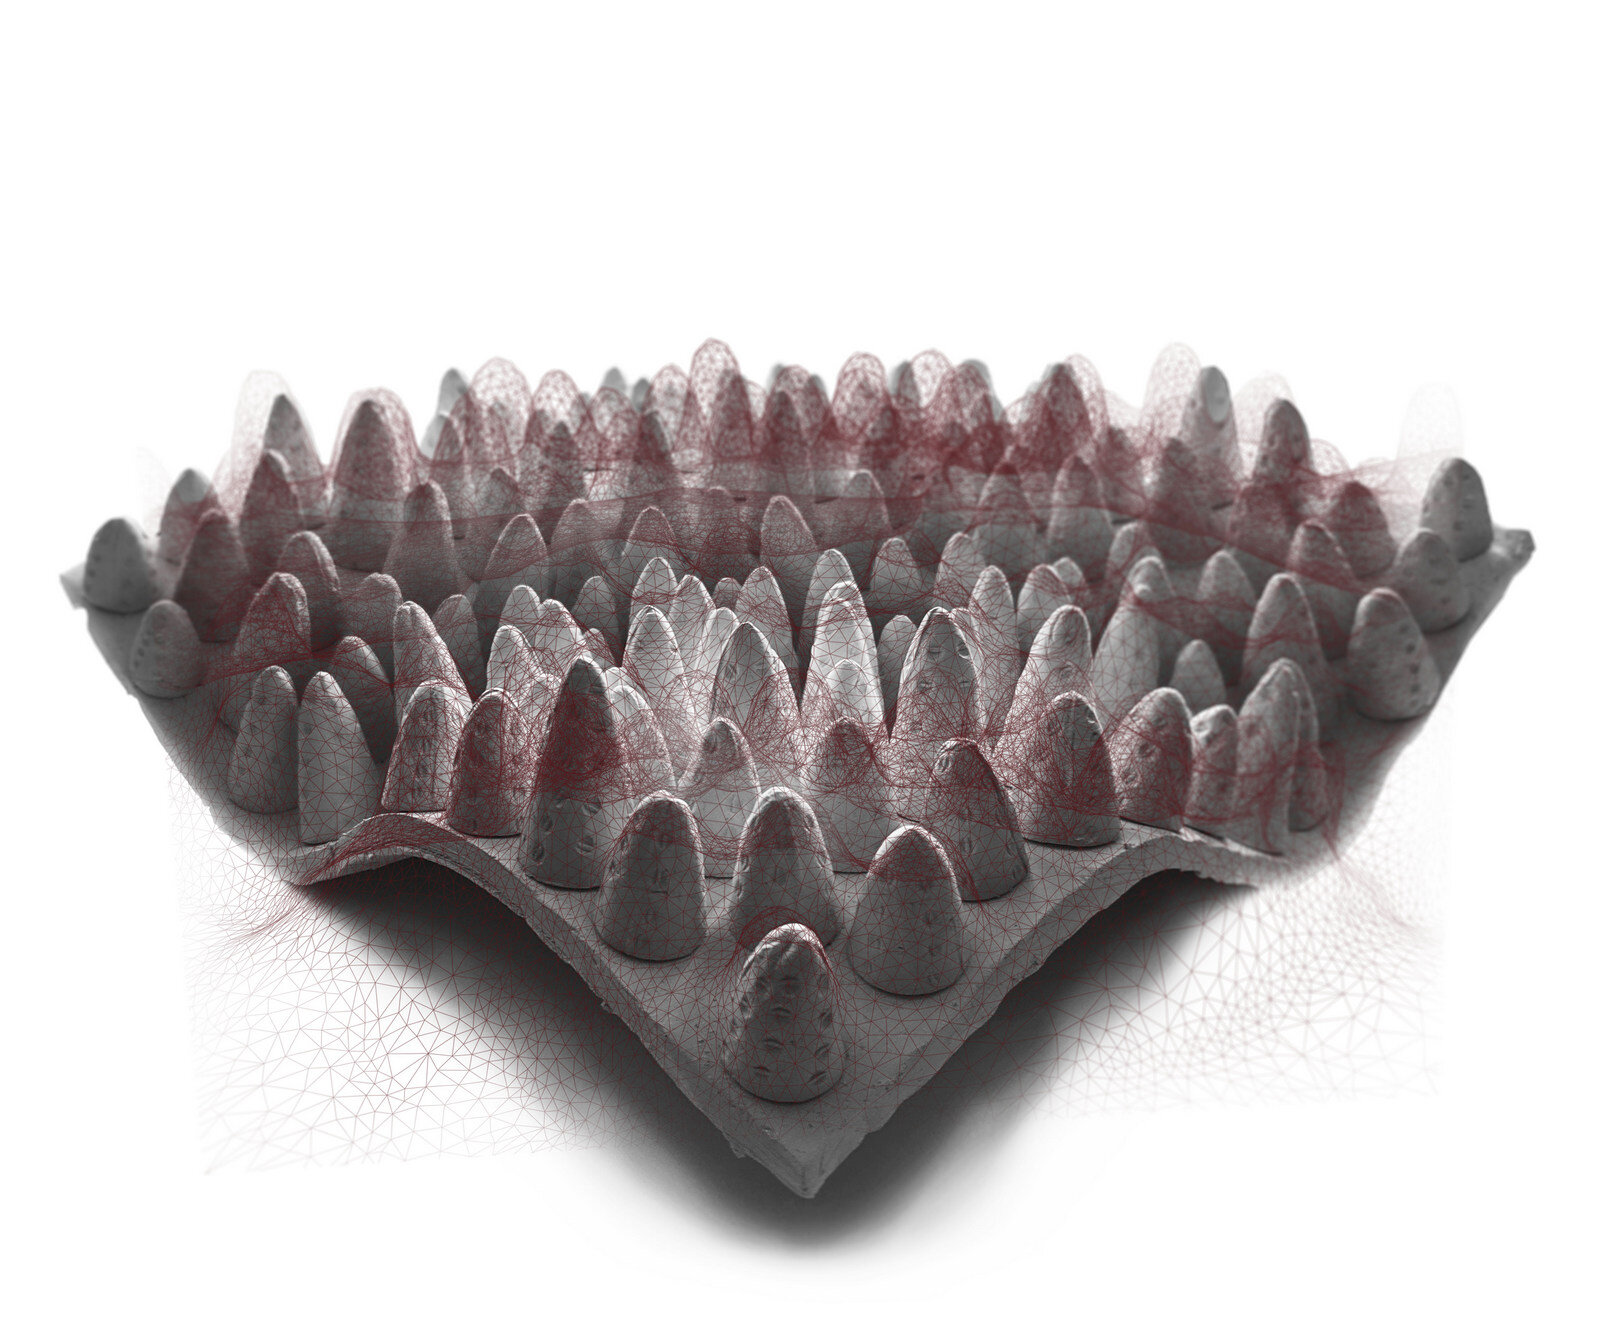
300mm x 300mm doubly curved mold is created. Flattened clay is placed on it. Using 3 plastic 3D printed molds, a series of clay spikes are created and attached to the clay. Once dried, the panel is heated to cone 04.
Glazing process
The technique of drip glaze is tested here. First, the ceramic panel is 3D scanned (using Autodesk ReCap) and the mesh is extracted. This mesh is used to caliberate the positions where the glaze needs to be applied. Once the positions are determined, a toolpath is generated using grasshopper. Tube with glaze is attached to a robotic arm which moves along the toolpath, dripping glaze on the ceramic panel below. Once the drip glaze is dried, the ceramic panel is heated to cone 10 in a kiln to complete the glazing process.


